|
 |
 |
 |
 |
 |
|
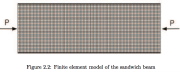
| Typical finite element model of a sandwich column to be analyzed for uniform axial compression |
|
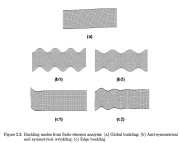
| Various "global" buckling modes of an axially compressed sandwich "column" |
|
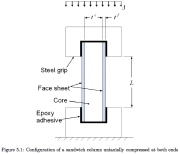
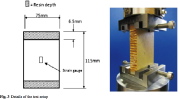
| A test specimen typically prepared for loading under axial compression |
|
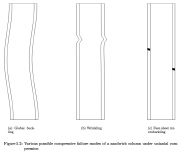
| Another view of typical sandwich column buckling and failure modes. |
|
| Axial load versus time for the dynamic response of the sandwich column to axial impact |
|
|
|
 |
 |
 |
 |
 |
|
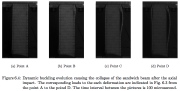
| High-speed images of the axially impacted sandwich column at four times after impact. Points A,B,C,D are indicated in the previous slide. |
|
| Axially compressed wide sandwich panel |
|
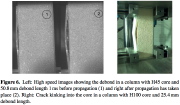
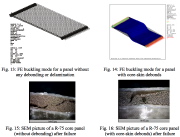
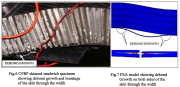
| Debonding of sandwich face sheet in axially compressed sandwich column |
|
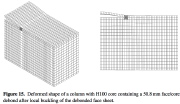
| Finite element model of the sandwich column after local buckling of the debonded face sheet |
|
| Buckling and failure of axially compressed foam-core composite sandwich panels |
|
|
|
 |
 |
 |
 |
 |
|
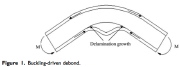
| Buckled debond region on compressive side of sandwich beam in bending |
|
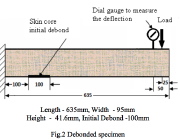
| Schematic of the cantilevered sandwich beam with a concentrated load at its free end |
|
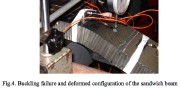
| Sandwich beam after failure |
|
| Detail of the failed region |
|
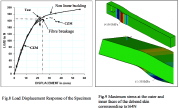
| Load-deflection curves and depiction of failed region |
|
|

