|
 |
 |
 |
 |
 |
|
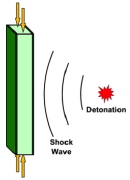
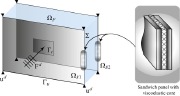
| A sketch of lateral blast loading upon a sandwich plate with uniform axial compression |
|
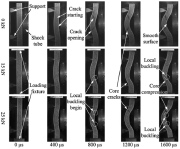
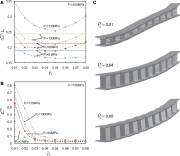
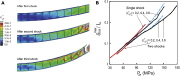
| Real-time side-view deformation of sandwich plate with 3 values of initial axial compression: 0, 15 and 25 kN |
|
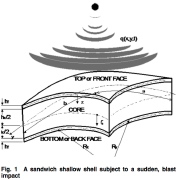
| Doubly-curved sandwich shell under blast loading |
|
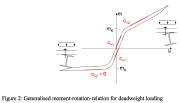
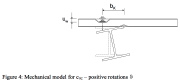
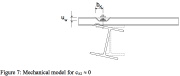
| Moment-rotation diagram of an I-section beam riveted to a sandwich panel |
|
| Mild rotation of the I-section beam pulling on the rivet without deforming the upper face sheet and gently bending the lower face sheet of the sandwich panel |
|
|
|
 |
 |
 |
 |
 |
|
| Larger rotation of the beam causing the rivet to deform the upper face sheet and concentrated dimpling of the lower face sheet |
|
| Effect on the sandwich of the opposite rotation from that shown in the previous image |
|
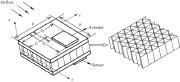
| Sandwich panel with triangular lattice core in supersonic airflow |
|
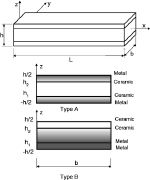
| Sandwich wall with functionally graded material |
|
| Double sandwich wall struction (each "face sheet" has a sandwich wall) |
|
|
|
 |
 |
 |
 |
 |
|
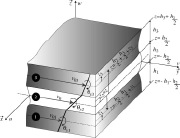
| Kinematics of each three-layered sandwich wall |
|
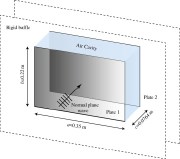
| Double sandwich plate system filled with air |
|
| Square honeycomb sandwich panel after 2 pressure shock loading from above |
|
| Square honeycomb sandwich panel subjected to 3 pressure shocks from above |
|
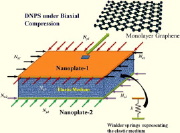
| Sandwich nano-plate under biaxial compression |
|
|

